Akoue does not download books: it puts in order the ones you already have. A folder of MP3s, an archive, files from a cloud or a messenger become a book with an author, chapters and a cover.
Import always goes through one screen, “Add books”. Wherever the files come from, the app walks nested folders, splits them into books, works out the chapter order, reads the tags and finds a cover. The files move into the app’s storage, except folders you asked to keep in place.
Import is free and has no limit on the number of books. It continues even if you close the app, and an import interrupted midway offers to continue at the next launch.
01/07
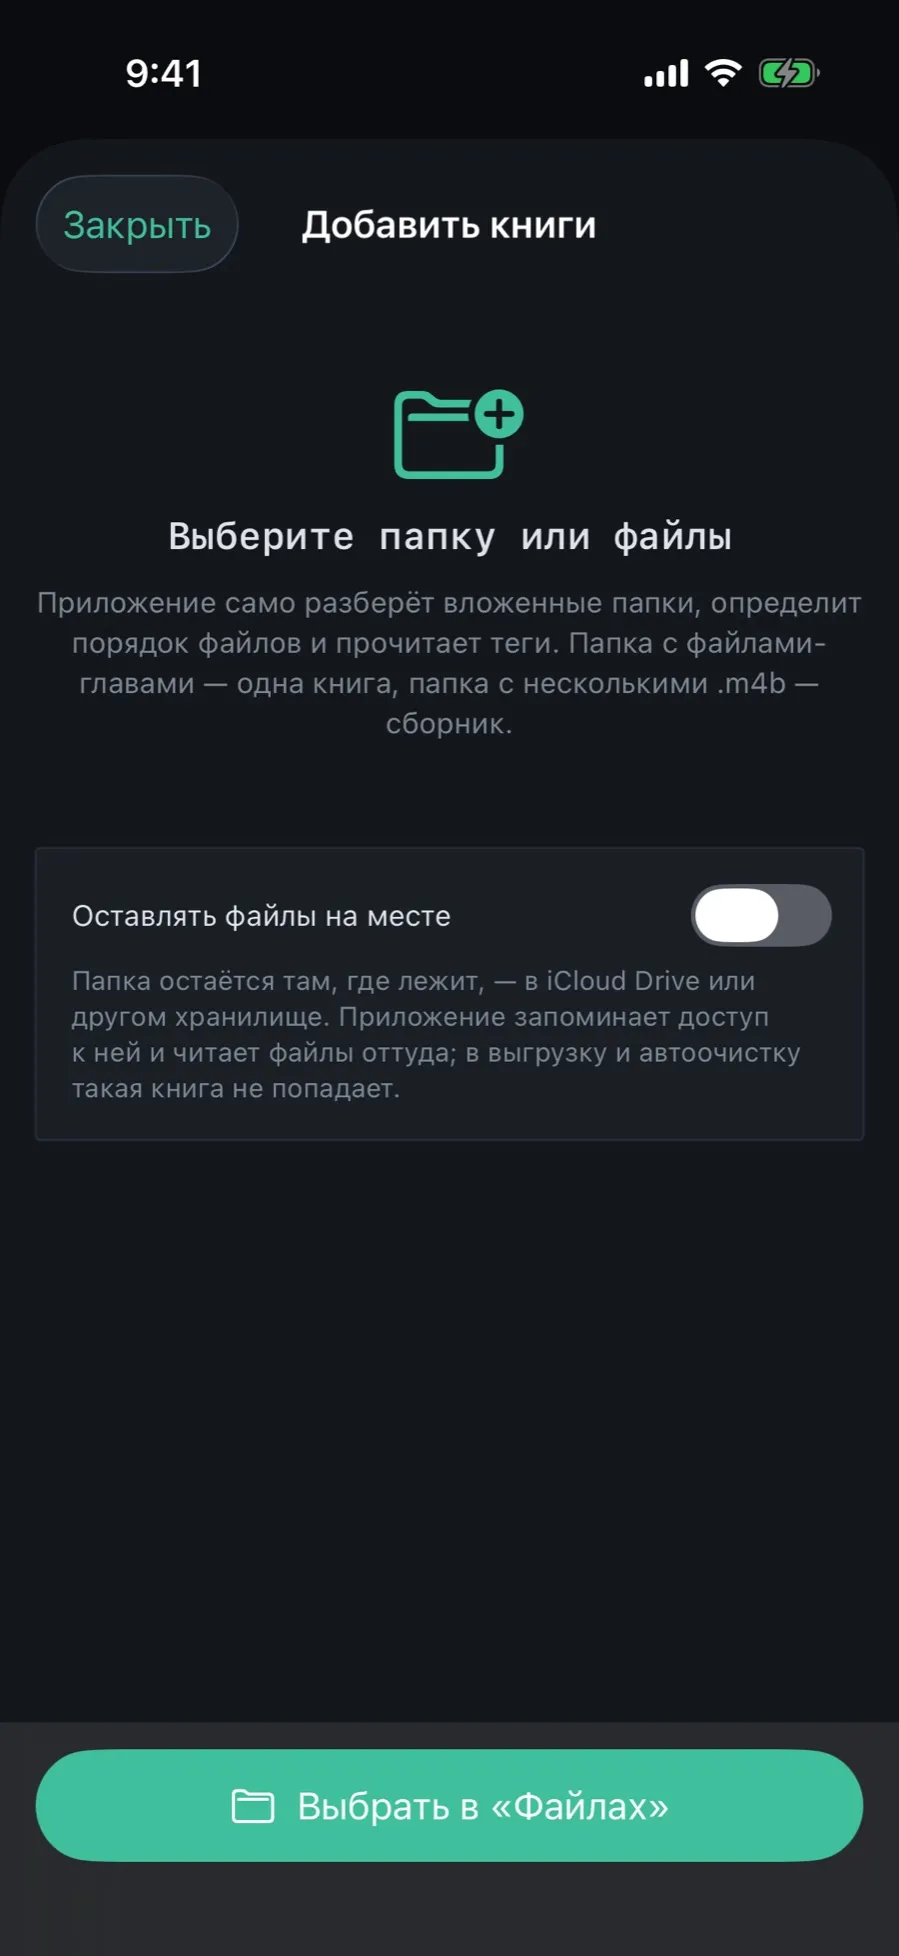
Add a folder or files from Files
The most direct way: point the app at a folder in iCloud Drive, On My iPhone or an external drive.
In the Library tap “+” in the top right corner and choose “Add a folder of files”.
Tap “Choose in Files” and pick a folder or separate files. zip archives work too.
If you picked several audio files, the app asks “Is this one book or several?”. “One book” makes the files its chapters in name order, “Separate books” starts a book per file.
Wait for “Import finished”. An empty library offers the same with its “Add books” button.
The “Keep files where they are” switch adds the book by reference: the folder stays in iCloud Drive or another storage, the app remembers access to it and reads the files from there. Such a book is left out of offloading and auto-cleanup. Folders only; separate files are always copied.
02/07
The Akoue folder in Files, Share and AirDrop
The app has its own folder in Files, and in the Finder when connected by cable. Whatever lands there, the app notices on its own.
Put a book folder into Files → On My iPhone → Akoue. Or send a file to Akoue with Share from Telegram, Mail or AirDrop: it lands in the same folder and the import screen opens at once.
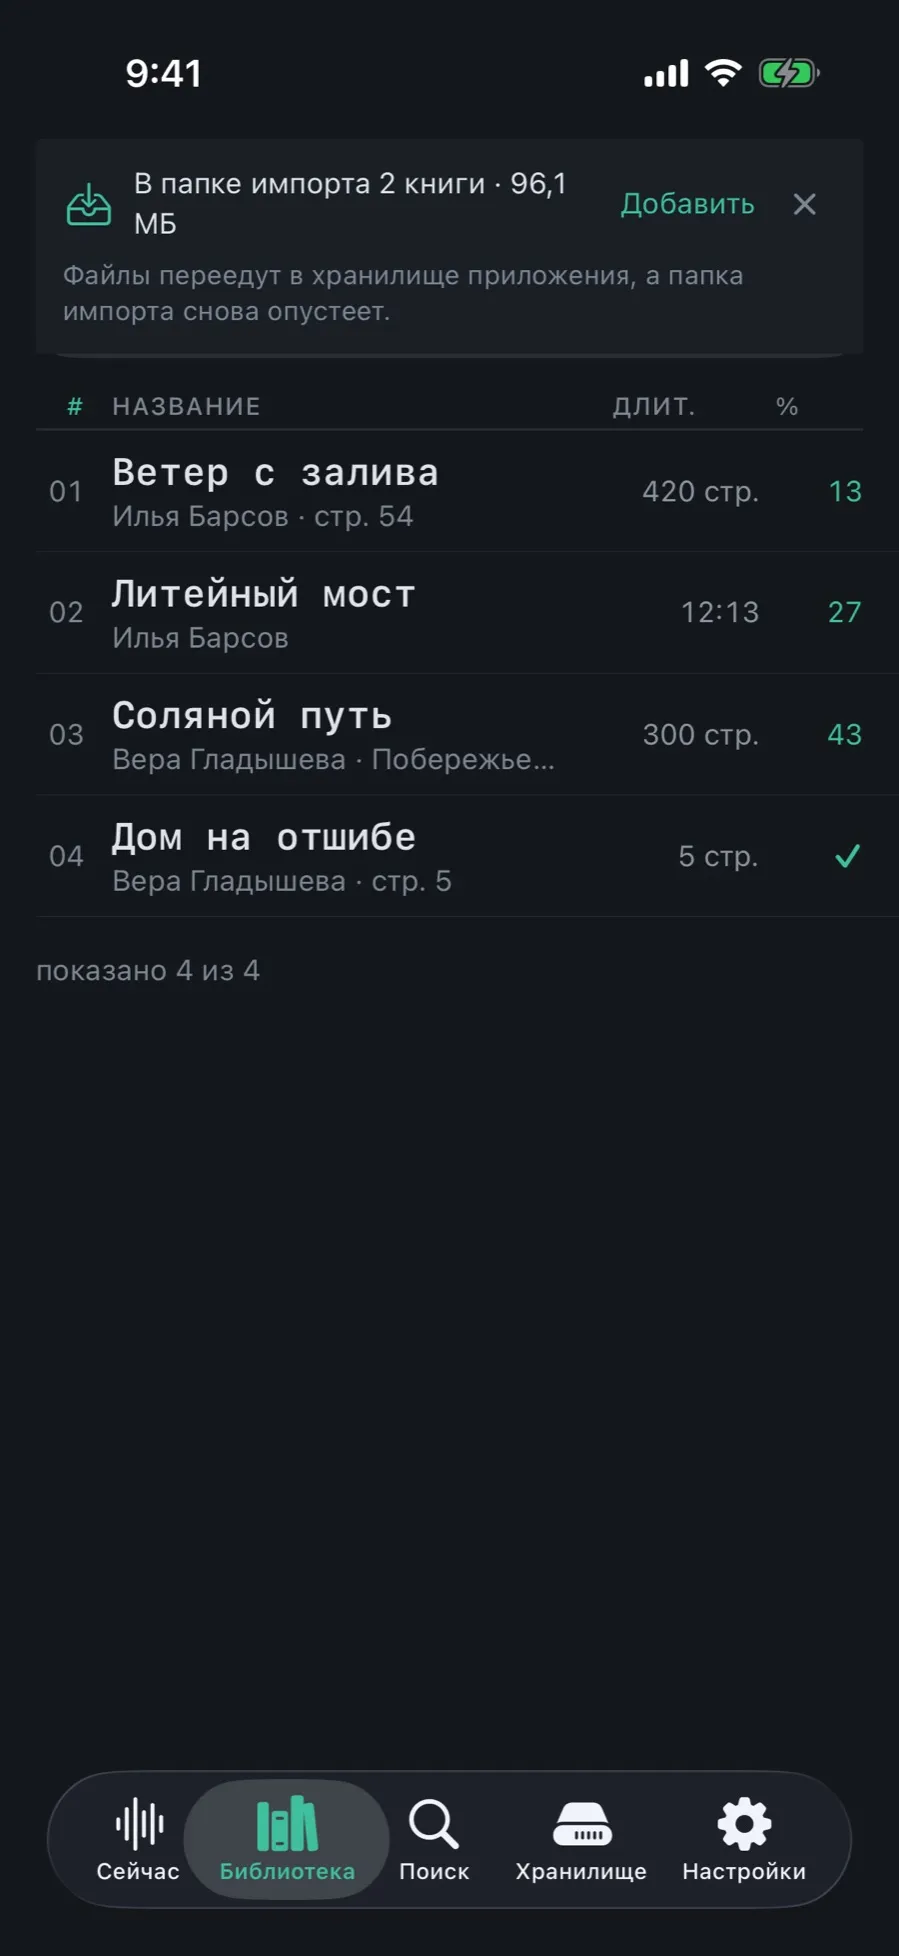
On the Now and Library tabs a banner appears: “N books in the import folder” with the size.
While files are still copying, the banner waits: taking half-copied files would leave the book truncated.
Tap “Add”. Nothing moves by itself: taking the files is always your decision.
The cross on the banner hides it until new files appear. The folder itself is empty again after import: the files move into the app’s storage.
03/07
Take from the folder and follow the progress
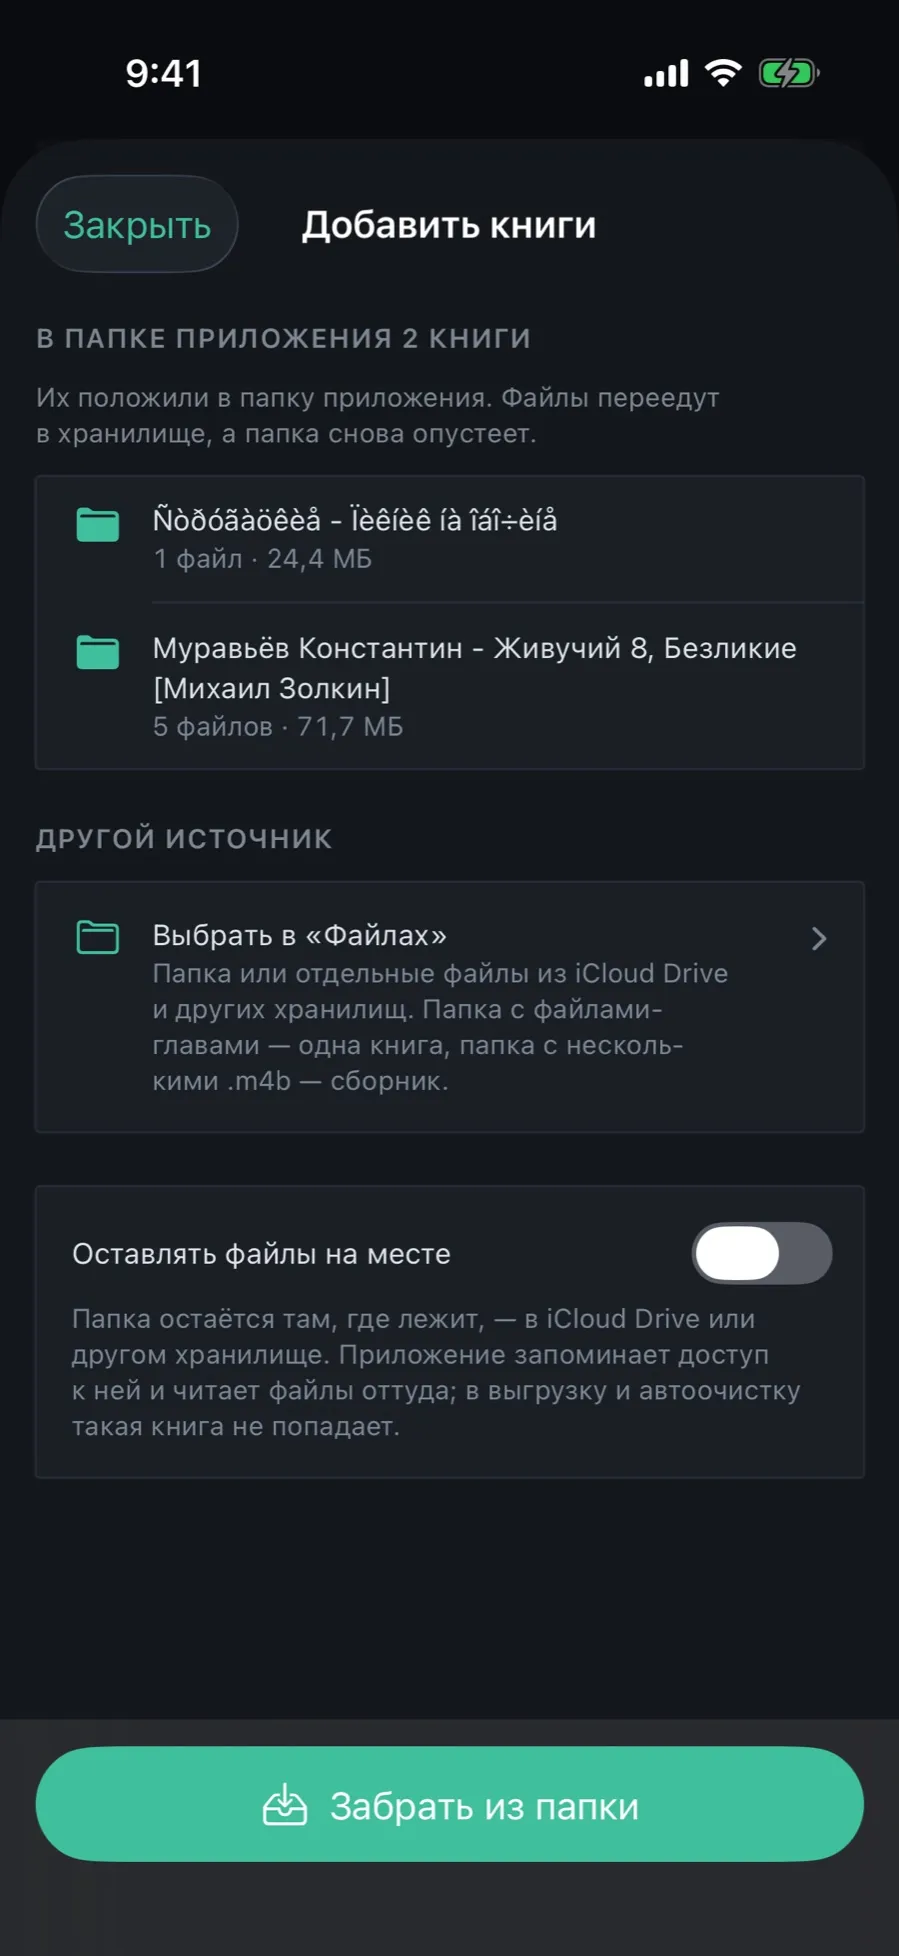
The import screen shows what lies in the app’s folder and the seven stages of parsing.
At the top of the screen is the list “N books in the app’s folder”: each folder’s name, file count and size.
Tap “Take from the folder”. Below is “Another source”, to pick something in Files instead.
The stages run in order: scanning the folder, splitting into books, file order, metadata, checking author and title, saving to the library, search index.
The “Cancel” button stops the import after the current stage: the books are removed from the library and the files return to the folder they came from.
Import continues even if you close the app. If it was closed midway, the next launch offers a choice: “Continue import” or “Cancel import”.
04/07
Check the author and title before saving
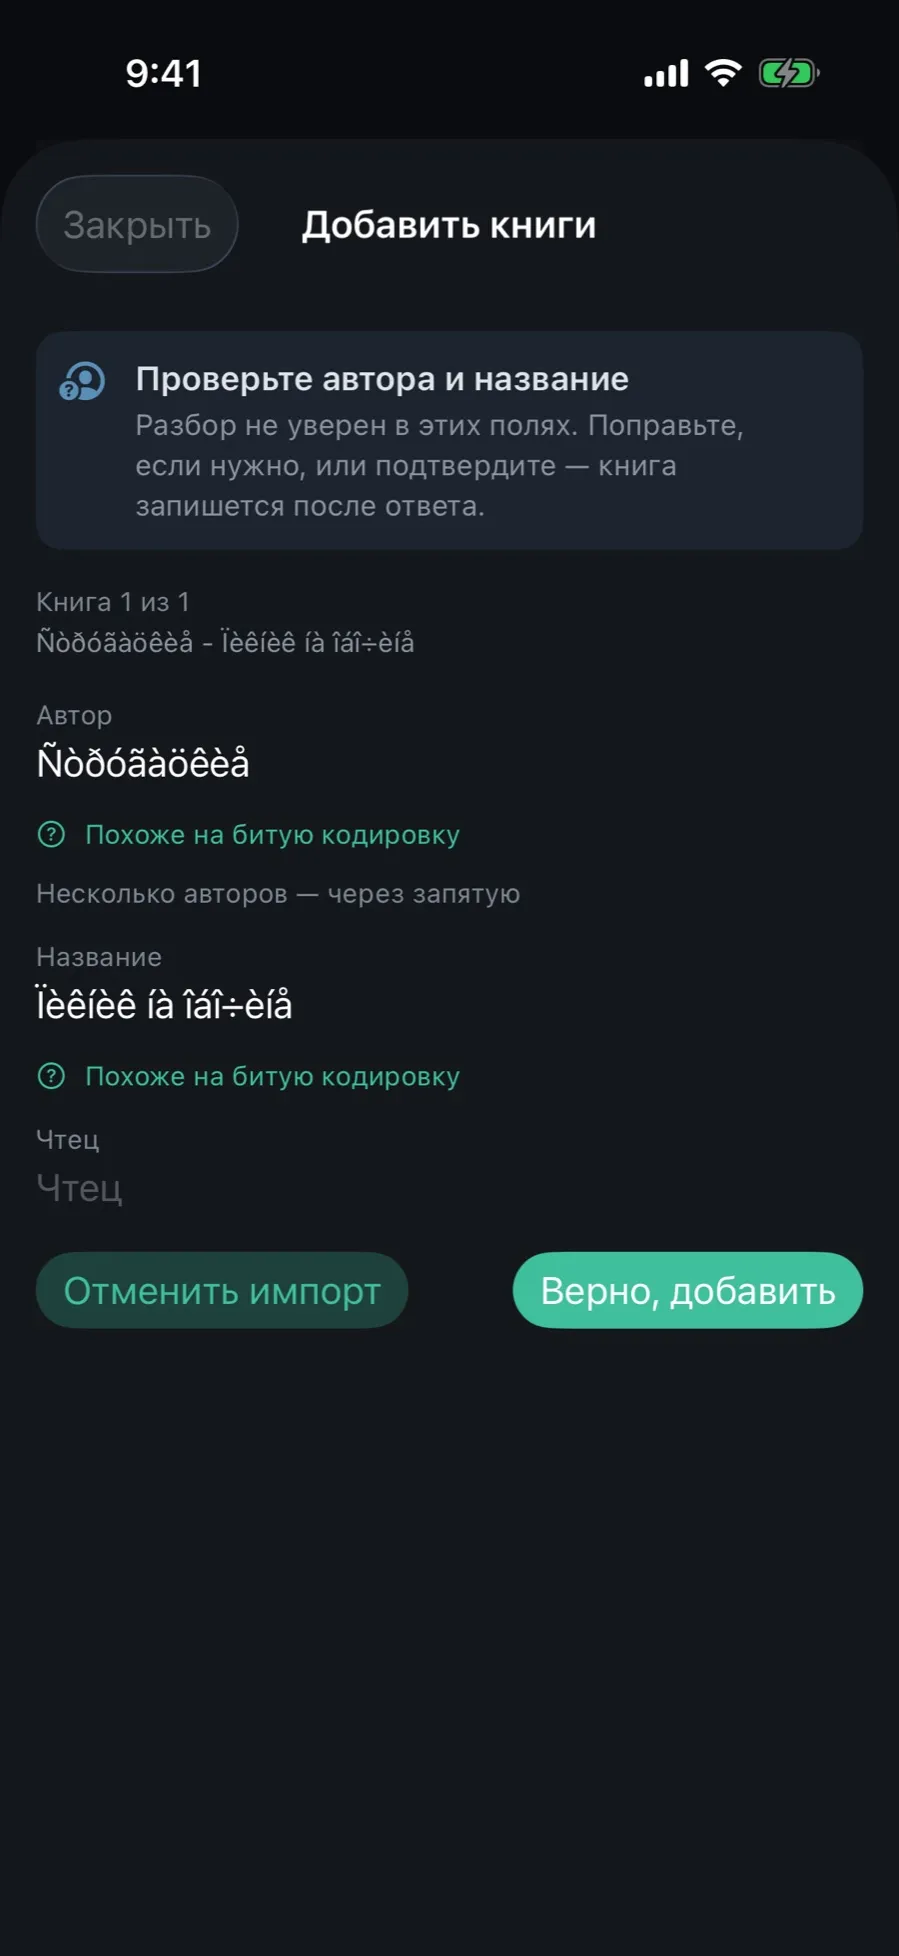
When the folder name leaves doubt, the app asks instead of guessing silently.
A screen “Check the author and title” appears with the “Author”, “Title” and “Narrator” fields already filled with a guess.
Under a doubtful field it says why: for example “Doesn’t look like a person’s name” or “The title was guessed from the folder name”.
Fix what is needed and tap “Correct, next”. On the last book the button is “Correct, add”.
“Cancel import” here cancels the whole import: the files stay where they were and nothing entered the library.
The question is asked one book at a time and only where parsing is unsure. An author or narrator the library already knows removes the question for that field.
05/07
Read the report
At the end the “Import finished” screen lists what came together by itself and what is worth a look.
The line under the heading gives the number of books and files, and the number of questions if there is anything to decide.
“Needs a decision”: the app could not tell which book an edition belongs to, or is not sure whether this is one book or a collection. The button opens the “Where it belongs” sheet.
“Done without asking”: an edition was attached to an existing book, or a possible duplicate was found. An attached edition can be detached.
“Notes”: cover not found, file order unreliable, format not supported or protected, suspicious title encoding.
The report is shown once and closed with “Close”. The books are already in the library; the notes do not affect them.
06/07
Repair broken text encoding
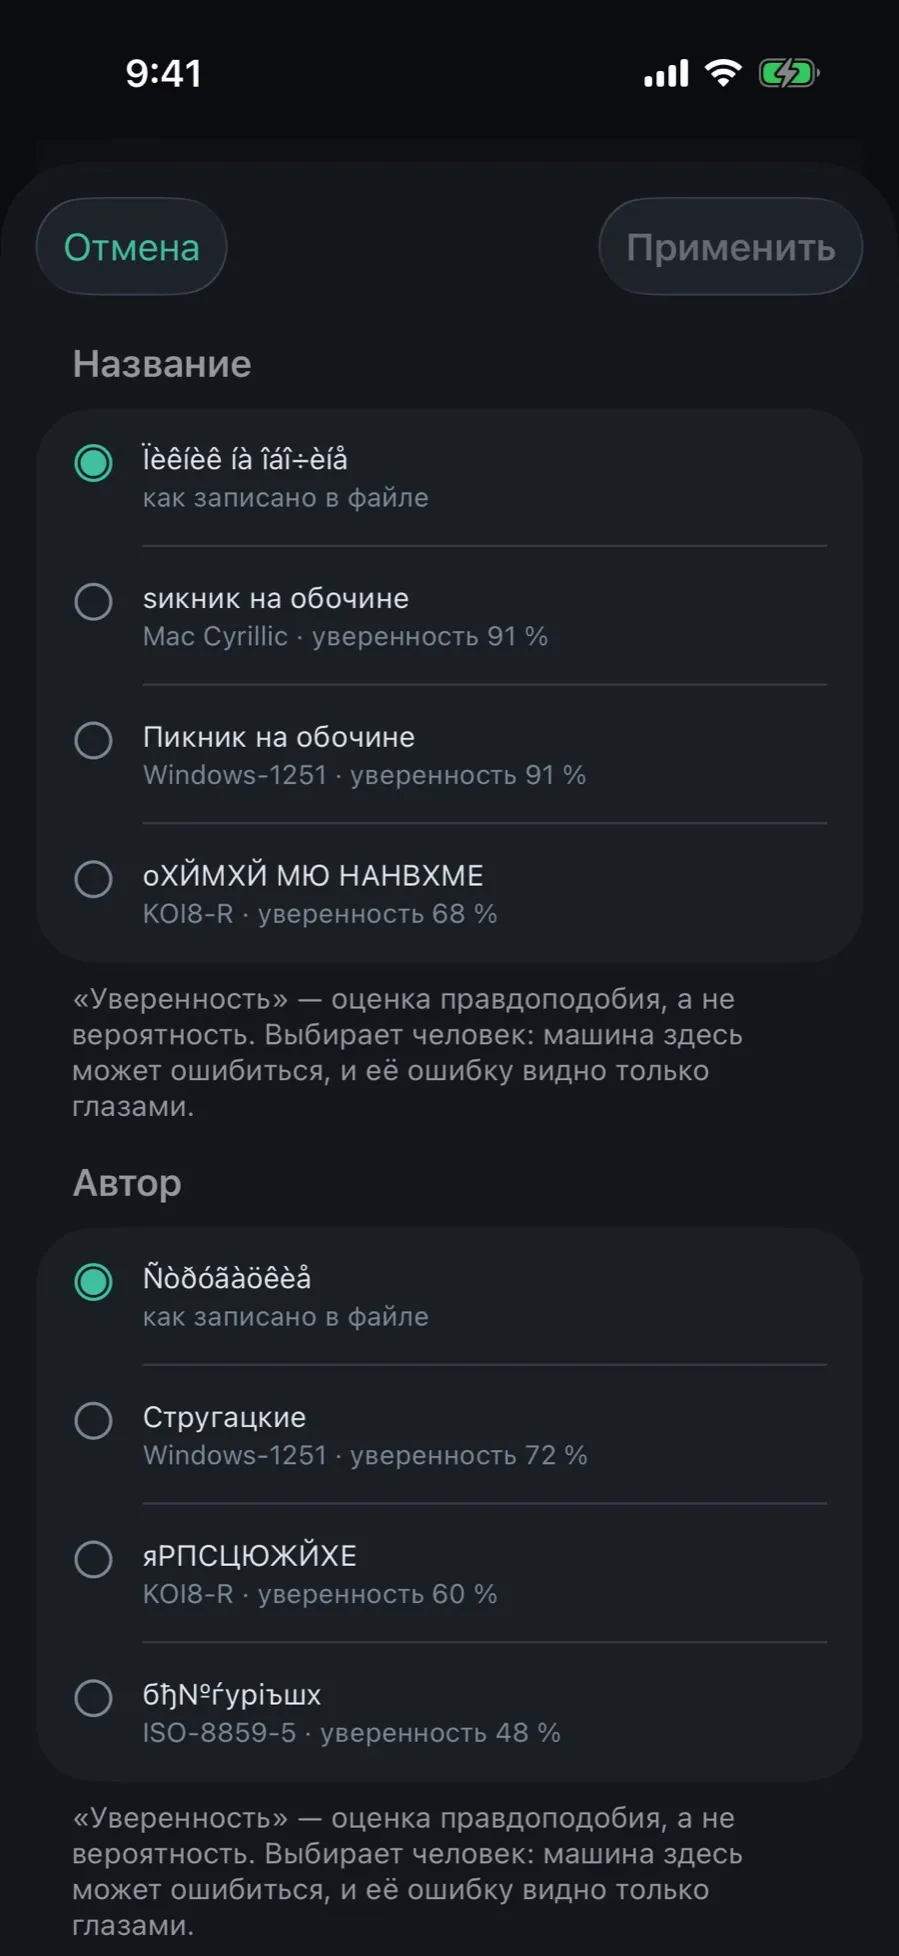
Titles from old torrents often arrive garbled: `Ïèêíèê íà îáî÷èíå` instead of “Пикник на обочине”. Fixed in one tap, with a preview.
In the report, next to the “Title encoding” note, tap the fix button. The same screen opens from the banner on the book card.
For each field, title, author, narrator and series, it shows readings with the encoding and a confidence, for example “Windows-1251 · confidence 91 %”. The original comes first.
Pick the right readings and tap “Apply”.
Confidence is a plausibility estimate; the choice is yours. The original spelling is kept in the book’s edit history.
07/07
A book without files
Finished a book in another app or read it on paper? Record it in the catalog so the series and the statistics are complete.
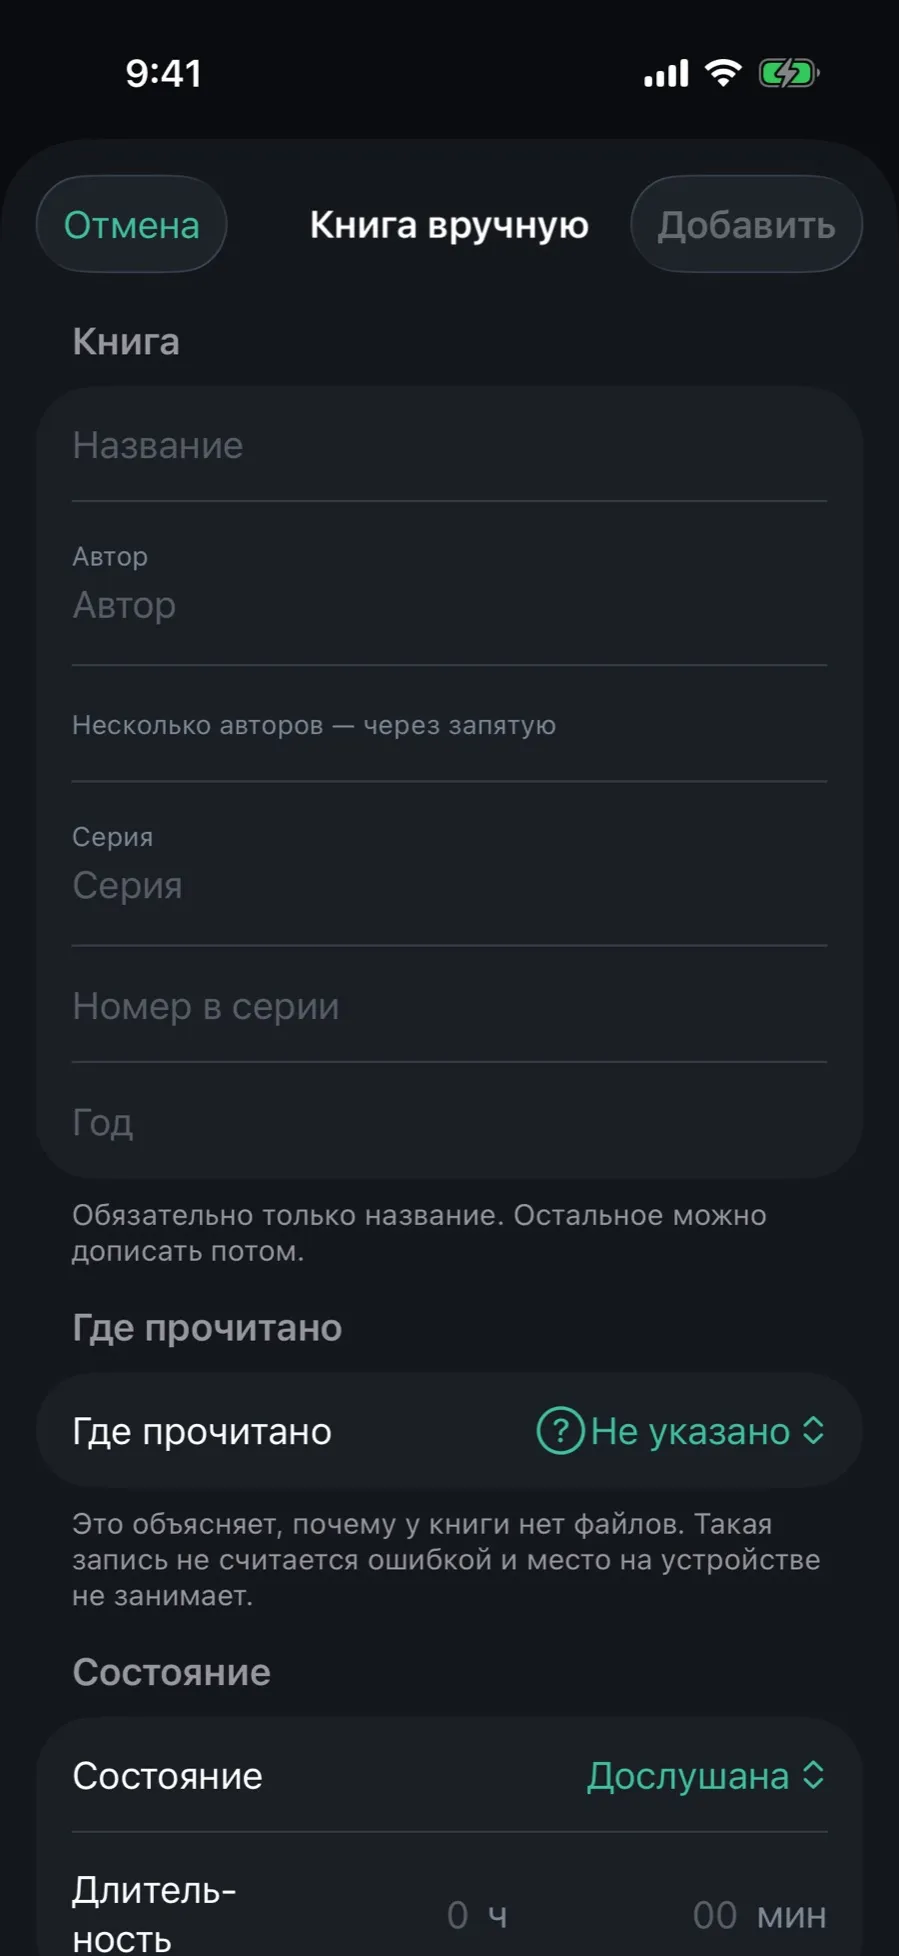
In the Library tap “+” and choose “Book without files”.
Fill in “Title”; the rest is optional: author, series and its number, year, narrator, language, note.
Set “Where it was read” and “Status”: finished, listening, set aside or not started. For started books you can give the duration and a rough progress.
Tap “Add”. Files can be brought to such a book later with the “Add files” button in its card.
What import does not do
It does not open Audible files (aax, aaxc): they are protected and show up in the report as “Format is protected”.
It does not convert ogg, wma or ape: such files are marked “Format not supported” and do not enter the book.
It does not go online for covers or descriptions: everything comes from your files and folders.
It does not support drag and drop on iPad or rar and 7z archives.